This is actually surprisingly straightforward, once you know the hoops to jump through.
Essentially there are 4 main things we need to do:
- Download El Capitan from the App Store
- Prepare an install image
- Create a virtual machine
- Install El Capitan
So let’s take a look at those, one by one…
Step 1: Download El Capitan from the App Store
Currently you need to be a registered developer. Provided you are, you can download the beta from Apple’s website (this redeems a coupon inside the App Store, so you need to be on a Mac to start the download).
Step 2: Prepare an install image
This section is all command-line stuff, so go fire up Terminal.app. (Warning: you’ll need at least 15GB of disk space free to deal with this next section safely… more if you don’t clean up the two temporary images we build along the way)
First up we want to install the iesd Rubygem which provides a nice way to deal with Apple’s InstallESD.dmg files:
sudo gem install iesd
Now we want to use that iesd tool to build a bootable image from the installer we downloaded from the App Store:
iesd -i /Applications/Install\ OS\ X\ 10.11\ Developer\ Beta.app -o ElCapitan-base.dmg -t BaseSystem
Okay, so that’s built us a read-only (DMG format) bootable image for the installer. At the moment, though, that’s missing the copy of OS X that it actually needs to go and install into your VM. To fix that we need to get a read-write (sparse image format) copy of the image:
hdiutil convert ElCapitan-base.dmg -format UDSP -o ElCapitan.sparseimage
Let’s throw away the read-only version now:
rm ElCapitan-base.dmg
And now we want to mount the disk image so we can add some files into it:
hdiutil mount ElCapitan.sparseimage
We also want to mount the InstallESD.dmg file from inside the installer we downloaded from the App Store, as it has some files we’ll need to copy over:
hdiutil mount /Applications/Install\ OS\ X\ 10.11\ Developer\ Beta.app/Contents/SharedSupport/InstallESD.dmg
Now we want to copy the files from the Install ESD into the writable image we made:
cp /Volumes/OS\ X\ Install\ ESD/BaseSystem.* /Volumes/OS\ X\ Base\ System/
Now we want to eject both of those:
hdiutil detach /Volumes/OS\ X\ Base\ System/
hdiutil detach /Volumes/OS\ X\ Install\ ESD/
And now we need to get it back into that read-only DMG format:
hdiutil convert ElCapitan.sparseimage -format UDZO -o ElCapitan.dmg
And let’s throw away the read-write version to free up disk space:
rm ElCapitan.sparseimage
Step 3: Create a virtual machine
- Open Parallels, and press the + button to create a new VM
- Install Windows or another OS from a DVD or image file
- Continue without a source
- When asked what type of OS you’re installing be sure to pick OS X
- Tick “Customise settings before installation” and click continue
- Go to the Hardware tab, then go to USB & Bluetooth, and turn off USB 3.0 support or the installer will kernel panic during boot
- Go to CD/DVD 1 and insert the ElCapitan.dmg file you created
- Go to CPU & Memory and make sure you have at least 2048MB of RAM
- Go to Video and ensure you have at least 128MB of video RAM
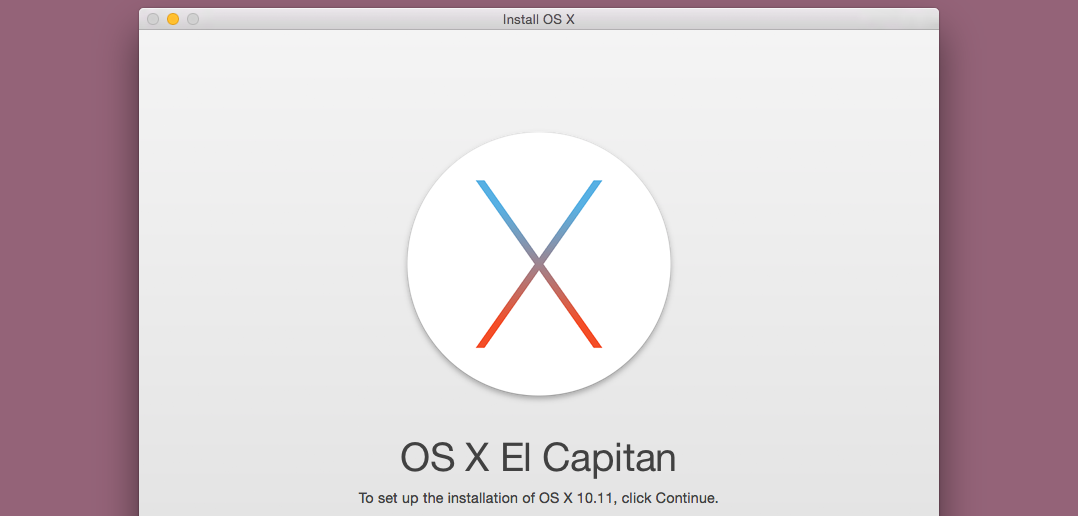
Step 4: Install El Capitan
Okay, now comes the moment of truth: boot the Virtual Machine and you should be presented with a white Apple logo on a black background for a few minutes, followed by the El Capitan installer.
Credit where credit’s due…
This post was originally inspred by this post by TheBressman on Reddit, however that was missing some steps, so I filled in the gaps with info from this blog post by Jacob Tomlinson. Thanks!
It’s not possible to install Parallels tools, isn’t it?
Thanks for the instructions Aaron. Most useful… (as in easy to follow and they work!) Herb
Cannot install Parallels Tools – stuck with low resolution. Any ideas?
You won’t be able to do that until Parallels provide an updated version of Tools for El Capitan. Keep an eye out for updates to Parallels Desktop, it’ll be in one of the ones coming up I expect.
You can install Parallels Tools by disabling rootless temporarily and manually installing the app.
1. Disable rootless:
sudo nvram boot-args="rootless=0"2. Mount Parallels Tools
3. Open Terminal to copy the app
cp -rf /Volumes/Parallels\ Tools/Install.app ~/Desktop4. Double-click on Install.app on your desktop and follow the instructions
5. Reboot
6. Delete Install.app from your desktop
7. Reenable rootless
sudo nvram boot-args="rootless=1"8. Reboot
Hope this helps someone else. Worked for me.
Thanks for the excellent instructions Aaron. They worked for me the whole way until, in the installer itself, the software asked for a disk and only presented 2 options, the installer ‘CD’ (image file) or my main Mac HD. Neither of these seemed right so I quit it each time. I tried expanding the HDD, etc to no avail. Is there a reason that you can think of that it doesn’t offer me the Parallels hard drive?
GREAT How-to!!!! Almost followed it to the letter, outside of the path. I keep most of my work in /user/Downloads as a scratch area.
Hi, this is a awesome guide, thank you!
Unfortunately I don’t get it to work. When I start the VM with the settings and the image I get a message “In dieser virtuellen Maschine ist kein Betriebssystem installiert. Bitte legen Sie die Installations-CD des Betriebssystems in das optische Laufwerk Ihres Mac ein und starten Sie die virtuelle Maschine neu.” In English it’s something like “There’s no OS in this VM. Please insert a installation disk with your OS in the optical drive of your mac and restart the vm”.
What’s my mistake? Maybe Parallels version 9.0.24251? Thank you so much. Pete
Does this also work with Apple’s latest Public Beta of El Capitan? I followed all steps without issues but step 4 fails:
rob@mbp-rob-2:~/Downloads$ iesd -i /Applications/Install\ OS\ X\ El\ Capitan\ Public\ Beta.app -o ElCapitan-base.dmg -t BaseSystem

==> Mounting /Applications/Install OS X El Capitan Public Beta.app/Contents/SharedSupport/InstallESD.dmg

Mounted: /var/folders/9t/rvw7mc_x3mb4t74x2wgwc4j80000gn/T/d20150712-7046-w22ahf

==> Mounting /var/folders/9t/rvw7mc_x3mb4t74x2wgwc4j80000gn/T/d20150712-7046-w22ahf/BaseSystem.dmg

Mounted: /var/folders/9t/rvw7mc_x3mb4t74x2wgwc4j80000gn/T/d20150712-7046-1mrcjyj/d20150712-7046-1srvnhw

==> Copying /var/folders/9t/rvw7mc_x3mb4t74x2wgwc4j80000gn/T/d20150712-7046-w22ahf/BaseSystem.dmg

Copied: /var/folders/9t/rvw7mc_x3mb4t74x2wgwc4j80000gn/T/d20150712-7046-1mrcjyj/d20150712-7046-1srvnhw/BaseSystem.dmg

==> Copying /var/folders/9t/rvw7mc_x3mb4t74x2wgwc4j80000gn/T/d20150712-7046-w22ahf/BaseSystem.chunklist

Copied: /var/folders/9t/rvw7mc_x3mb4t74x2wgwc4j80000gn/T/d20150712-7046-1mrcjyj/d20150712-7046-1srvnhw/BaseSystem.chunklist

==> Copying /var/folders/9t/rvw7mc_x3mb4t74x2wgwc4j80000gn/T/d20150712-7046-w22ahf/Packages

Copied: /var/folders/9t/rvw7mc_x3mb4t74x2wgwc4j80000gn/T/d20150712-7046-1mrcjyj/d20150712-7046-1srvnhw/System/Installation/Packages

==> Unmounting /var/folders/9t/rvw7mc_x3mb4t74x2wgwc4j80000gn/T/d20150712-7046-w22ahf/BaseSystem.dmg

Unmounted: /var/folders/9t/rvw7mc_x3mb4t74x2wgwc4j80000gn/T/d20150712-7046-1mrcjyj/d20150712-7046-1srvnhw

==> Merging /var/folders/9t/rvw7mc_x3mb4t74x2wgwc4j80000gn/T/d20150712-7046-1mrcjyj/BaseSystem.dmg.shadow

Merged: /var/folders/9t/rvw7mc_x3mb4t74x2wgwc4j80000gn/T/d20150712-7046-b6yr0h/BaseSystem.dmg

==> Unmounting /Applications/Install OS X El Capitan Public Beta.app/Contents/SharedSupport/InstallESD.dmg

Unmounted: /var/folders/9t/rvw7mc_x3mb4t74x2wgwc4j80000gn/T/d20150712-7046-w22ahf

  /Users/rob/Downloads/ElCapitan-base.dmg
rob@mbp-rob-2:~/Downloads$ hdiutil convert ElCapitan-base.dmg -format UDSP -o ElCapitan.sparseimage
Reading Protective Master Boot Record (MBR : 0)…
Reading GPT Header (Primary GPT Header : 1)…
Reading GPT Partition Data (Primary GPT Table : 2)…
Reading (Apple_Free : 3)…
Reading disk image (Apple_HFS : 4)…
..................................................................................................................................................................................
Reading (Apple_Free : 5)…
Reading GPT Partition Data (Backup GPT Table : 6)…
..................................................................................................................................................................................
Reading GPT Header (Backup GPT Header : 7)…
...................................................................................................................................................................................
Elapsed Time: 37.747s
Speed: 186.8Mbytes/sec
Savings: 15.2%
created: /Users/rob/Downloads/ElCapitan.sparseimage
rob@mbp-rob-2:~/Downloads$ rm -fv ElCapitan-base.dmg
ElCapitan-base.dmg
rob@mbp-rob-2:~/Downloads$ hdiutil mount ElCapitan.sparseimage
/dev/disk2 GUID_partition_scheme
/dev/disk2s1 Apple_HFS /Volumes/OS X Base System
rob@mbp-rob-2:~/Downloads$ hdiutil mount /Applications/Install\ OS\ X\ El\ Capitan\ Public\ Beta.app/Contents/SharedSupport/InstallESD.dmg
Checksumming Protective Master Boot Record (MBR : 0)…
Protective Master Boot Record (MBR :: verified CRC32 $52BBC86D
Checksumming GPT Header (Primary GPT Header : 1)…
GPT Header (Primary GPT Header : 1): verified CRC32 $25B1B869
Checksumming GPT Partition Data (Primary GPT Table : 2)…
GPT Partition Data (Primary GPT Tabl: verified CRC32 $37F5EDF1
Checksumming (Apple_Free : 3)…
(Apple_Free : 3): verified CRC32 $00000000
Checksumming EFI System Partition (C12A7328-F81F-11D2-BA4B-00A0C93EC93B : 4)…
.....
EFI System Partition (C12A7328-F81F-: verified CRC32 $B54B659C
Checksumming disk image (Apple_HFS : 5)…
...............................................................................................................................................................................
disk image (Apple_HFS : 5): verified CRC32 $522CF583
Checksumming (Apple_Free : 6)…
..................................................................................................................................................................................
(Apple_Free : 6): verified CRC32 $00000000
Checksumming GPT Partition Data (Backup GPT Table : 7)…
GPT Partition Data (Backup GPT Table: verified CRC32 $37F5EDF1
Checksumming GPT Header (Backup GPT Header : 8)…
GPT Header (Backup GPT Header : 8): verified CRC32 $A469E686
verified CRC32 $0204AA03
/dev/disk3 GUID_partition_scheme
/dev/disk3s1 EFI
/dev/disk3s2 Apple_HFS /Volumes/OS X Install ESD
rob@mbp-rob-2:~/Downloads$ cp -v /Volumes/OS\ X\ Install\ ESD/BaseSystem.* /Volumes/OS\ X\ Base\ System/
/Volumes/OS X Install ESD/BaseSystem.chunklist -> /Volumes/OS X Base System/BaseSystem.chunklist
/Volumes/OS X Install ESD/BaseSystem.dmg -> /Volumes/OS X Base System/BaseSystem.dmg
rob@mbp-rob-2:~/Downloads$ hdiutil detach /Volumes/OS\ X\ Base\ System/
"disk2" unmounted.
"disk2" ejected.
rob@mbp-rob-2:~/Downloads$ hdiutil detach /Volumes/OS\ X\ Install\ ESD/
"disk3" unmounted.
"disk3" ejected.
rob@mbp-rob-2:~/Downloads$ hdiutil convert ElCapitan.sparseimage -format UDZO -o ElCapitan.dmg
Preparing imaging engine…
Reading Protective Master Boot Record (MBR : 0)…
(CRC32 $D9D21664: Protective Master Boot Record (MBR : 0))
Reading GPT Header (Primary GPT Header : 1)…
(CRC32 $0124DF99: GPT Header (Primary GPT Header : 1))
Reading GPT Partition Data (Primary GPT Table : 2)…
(CRC32 $65477FA9: GPT Partition Data (Primary GPT Table : 2))
Reading (Apple_Free : 3)…
(CRC32 $00000000: (Apple_Free : 3))
Reading disk image (Apple_HFS : 4)…
..................................................................................................................................................................
(CRC32 $8E3BE77B: disk image (Apple_HFS : 4))
Reading (Apple_Free : 5)…
..................................................................................................................................................................................
(CRC32 $00000000: (Apple_Free : 5))
Reading GPT Partition Data (Backup GPT Table : 6)…
...................................................................................................................................................................................
(CRC32 $65477FA9: GPT Partition Data (Backup GPT Table : 6))
Reading GPT Header (Backup GPT Header : 7)…
...................................................................................................................................................................................
(CRC32 $162CCE44: GPT Header (Backup GPT Header : 7))
Adding resources…
...................................................................................................................................................................................
Elapsed Time: 52.920s
File size: 6516172814 bytes, Checksum: CRC32 $B8F2473B
Sectors processed: 17036128, 14443116 compressed
Speed: 133.3Mbytes/sec
Savings: 25.3%
created: /Users/rob/Downloads/ElCapitan.dmg
rob@mbp-rob-2:~/Downloads$ rm -fv ElCapitan.sparseimage
ElCapitan.sparseimage
However in step 4 Parallels fails booting and shows:
Boot Failed. EFI DVD/CDROM
Boot Failed. EFI Hard Drive
I followed the instructions and I get an EFI shell right after I point to the DMG file. Any tricks to getting it to work?
@Anon: Nice workaround, curious to find out if there are any security issues with this approach, although I suppose it won’t matter much once official Parallels Tools come out for El Capitan.
This doesn’t work for me with the first public beta of El Captain. I’ve followed all steps but all I get is an EFI shell; before that all I get is:
Boot Failed. EFI Hard Drive
Boot Failed. EFI DVD/CDROM
PXE.DHCP (Timeout 60s)
…….
and then it goes to the EFI shell.
Anon’s steps above to install Parallels Tools work, but there is a step that is left out. After Step 1 when you disable rootless, you need to reboot, then continue to steps. It won’t work otherwise.
I have the same problem that others commented : I’m unable to install “El Capitan” public beta, when Parallels tries to use the DMG file , it keeps showing the following :
oot Failed. EFI Hard Drive
Boot Failed. EFI DVD/CDROM
PXE.DHCP (Timeout 60s)
…….
and then it goes to the EFI shell.
Any ideas ?
Regards,
As Rafael Alvarez and others have noted, in the public beta it goes to the Shell eventually.
I even tried making a new HD, 32 GB, non-expanding, within the Config screen, as that had been suggested on the earlier, TheBressman blog, instructions. Still no luck.
OK, this is how you can do it, finally, but it’s more cumbersome than necessary, and you need to have an external drive. Bear with me.
Install El Capitan Preview Beta (EC) on an external USB or Thunderbolt drive. If you already have Yosemite installed on that drive, just install the EC preview as you would normally do. The recovery partition for the external drive will have the info to re-install El Capitan, but you can’t use the external drive Parallels to create a VM of EC via the recovery disk, because regardless of booting up EC from the external drive, Parallels sees only the main internal HD recovery partition, which will install only Yosemite, not EC.
Boot from your internal Mac drive. Use the following method to let the Disk Utility in Yosemite show the recovery partitions, which are normally hidden. http://osxdaily.com/2011/09/23/view-mount-hidden-partitions-in-mac-os-x/
Make the recovery partitions on both the external and internal drives visible, and mount them.
Open up the recovery partition of the internal drive (with Yosemite installed) and copy the directory “com.apple.recovery.boot” on to your clipboard, then paste it on your Desktop for later use, then send the directory to Trash and empty Trash to free up space on the Recovery partition.
Then open up the recovery partition of the external drive (in which EC has been installed) in Finder, and copy the directory “com.apple.recovery.boot” on to your clipboard. Go back to the Recovery partition of the internal drive and paste this directory into that partition. This directory has the information necessary to download El Capitan Preview instead of Yosemite, and your main drive, even though it is Yosemite, will have its Recovery partition look for El Capitan. After creating the VM you can change it back by copying over the old com.applerecovery.boot directory you have stored on your Desktop for safekeeping.
You can unmount both Recovery partitions now in Disk Utility–you probably have to do that.
Go to Parallels and tell it to create a new VM from the OS X Recovery partition–it will find the one on the main drive. It will do that, and let you DL El Capitan preview, and create a VM. When you go to run the VM, it will crash with a kernel panic, because the VM has not yet been configured correctly. Shut down the new VM, go to Configure, uncheck the USB 3.0 box and maybe the video camera box as well, change the video memory to 128 mb, increase the RAM allocation to 4096 if you want, the reboot the VM, and go through the setup. You will have a working El Capitan Parallels VM on your Yosemite main drive.
I would show the screen shot from Grab here, but there is no way to upload a file. You can see it by DLing it from my Mega site, though.
https://mega.co.nz/#!LM5nSIZY!4HJ573d4xlt0O0T5b8D3-211MXMQkx9gOhnrwrW7abE
And it’s true, Parallels Tools will not install on the new El Capitan VM. You can mount the Tools CD on the VM, and it is blank. Change the View to List, and you’ll see the Install program, double click on it and it will start to install, ask for your password, then stop installing. We have to wait for Parallels to make their program compatible with the EC VM, I suppose.
Strange that so many people are having problems booting the DMG that comes out the end of the process… it works for me.
@KenV54: Nice workaround using the recovery partition on another drive, that should also do the trick pretty nicely.
Anyone having problems with my method should give that recovery partition method a try! Just don’t overwrite your recovery partition on your primary hard disk unless you want to tempt fate… :)
@Aaron B. Russell–Thanks very much.
I don’t know, either, why the image method doesn’t work for many people, including myself, but maybe it has to do with some idiosyncrasy of the OS X installed or the Parallels installation. It seems to be an EFI boot problem, something akin to what I had when I installed Boot Camp on my MBPro Retina (2014), and had to use WinClone to fix the boot partition. I didn’t understand it then, and I don’t understand it now, but I was able to fix Boot Camp so that it would boot Windows 10 Preview via “legacy boot” or something like that, and I was also able to create a Parallels VM of Boot Camp.
As for overwriting the Recovery partition on the main drive, I agree, it’s potentially treacherous. But I think if you put back the saved original directory (after again freeing up the space on the partition by putting the “new” El Capitan directory into the Trash and emptying Trash) on the Recovery partition, you’re good to go. It’s just a partition, after all, and these are not hidden or protected files or directories. Maybe it’s not for the technologically “faint of heart.” That wouldn’t apply to any of our posters, here, of course. :-)
And here’s how to install Parallels Tools (from Parallels)using Terminal, from within the El Capitan Preview VM
Before installing execute the command
sudo nvram boot-args=”rootless=0″
then reboot the VM, connect Parallels Tools image to the VM, and install Parallels Tools:
cd /Volumes/Parallels\ Tools
sudo open Install.app
For those of you looking to install El Capitan Beta in a Parallels virtual machine but I running into the EFI Shell issue, there’s a simpler approach than using the Recovery Partition:
Create a bootable Yosemite image. Yosemite is still available in the Mac OS App Store. Use the following instructions to create a bootable image.
The only change you need to make is to use ‘hdiutil detach’ in steps 9 and 10 instead of ‘hdiutil unmount’.
After you’ve booted and installed Yosemite, install the Parallels Tools and reboot.
With Yosemite installed, go to the App Store and download and install El Capitan Beta.
After you’ve installed it, go to About This Mac and use Software Update to update to Beta 2.
I hope this helps others get El Capitan Beta running in Parallels.
Thanks for the great instructions.
It looks like Parallels can now install El Capitan without modification. I upgraded from a virtual Yosemite (with USB 3.0 turned off) successfully using only the redeem code for El Capitan on the App Store.
I just ran the process for both the Public Beta and Developer Beta and verified that Developer beta works while Publis Beta gives the EFI Shell error
@Misha: Aha! That could well explain why it works for some and not others… something must be different in the public beta version… though you’d expect it to be able to boot machines all the same… Apple’s “Install OS X” tool essentially does what the steps above do, as far as I understand it. Maybe an extra step is needed in the public beta version?
Hi, was anyone able to get this to work with the public beta? I tried in Parallels and VirtualBox and get the same result… When booting it gives the EFI Shell error/
Agree about the Dev Beta, since my version works.
@KenV54 – will probably implement
Migration cannot be done from (either Yosemite or El Capitan) other network or machines because the Tools haven’t been installed? Or is there another reason?? however Cloud information can be used to set up log-ins etc.
@KenV54 – Did you mean run terminal from within the VM (El Capitan beta)? I cannot get ANY Utilities, or Apps to appear in the VM once it starts up.
Appreciate your fine reporting and instructions, they worked to the extent I tried them.
Omitted were the updating process (same as local versions using App Store) and the install of Parallel Tools, which I will try to accomplish after the updates finish. Parallels Tools give the ability to configure and use local resources, both of which may prove essential.
Anon’s fix to set the Parallels Tools to rootless to install did not work. Otherwise, The install up to Dev Preview 5 worked fine. I have a ticket in Parallels on this topic. Maybe they will figure it out soon.
I downloaded a trail version of Parrallels 11 could get OS X 10.11 to install but not parallel tools..What I did was to creeat a machine with Yosimite (OSX 10.10) install parallel tools then go throgh th painful procder of updating to OS X 10.11 beta by beta…Talk all afternoon and evening now have OS X 10.11 running with beta 7 installed in parallels compleate with tools….one thing the chack mouse feture dose not work
Well guys, thanks for all your effort., at least I learned a lot….. I appreciate your work.
This is FYI (should be targeted at Apple of course)
It does not work at all with the final release of El Capitan. when I use Parallels it ends ups in the EFI shell. Whatever I do to make the .dmg file available to Parallels it does not work. Th installer forces me to DOWNLOAD the image which takes 4 hours while my internet connection is way faster then that.
I really do not understand why virtualization is so fokking sad on the Mac using Mac OSX as a host and Mac OSX as a guest inside that very same host. On Linux and on Windows virtualization is much much better and simpler!!